Created: Sunday, March 8, 2026
Last Updated: Sunday, March 8, 2026
Running GNS3 on Apple Silicon
This guide documents how to install and configure GNS3 on a Mac with Apple Silicon. The traditional GNS3 VM does not work on these machines due to architecture incompatibility, but there is an official ARM64 solution that works well.
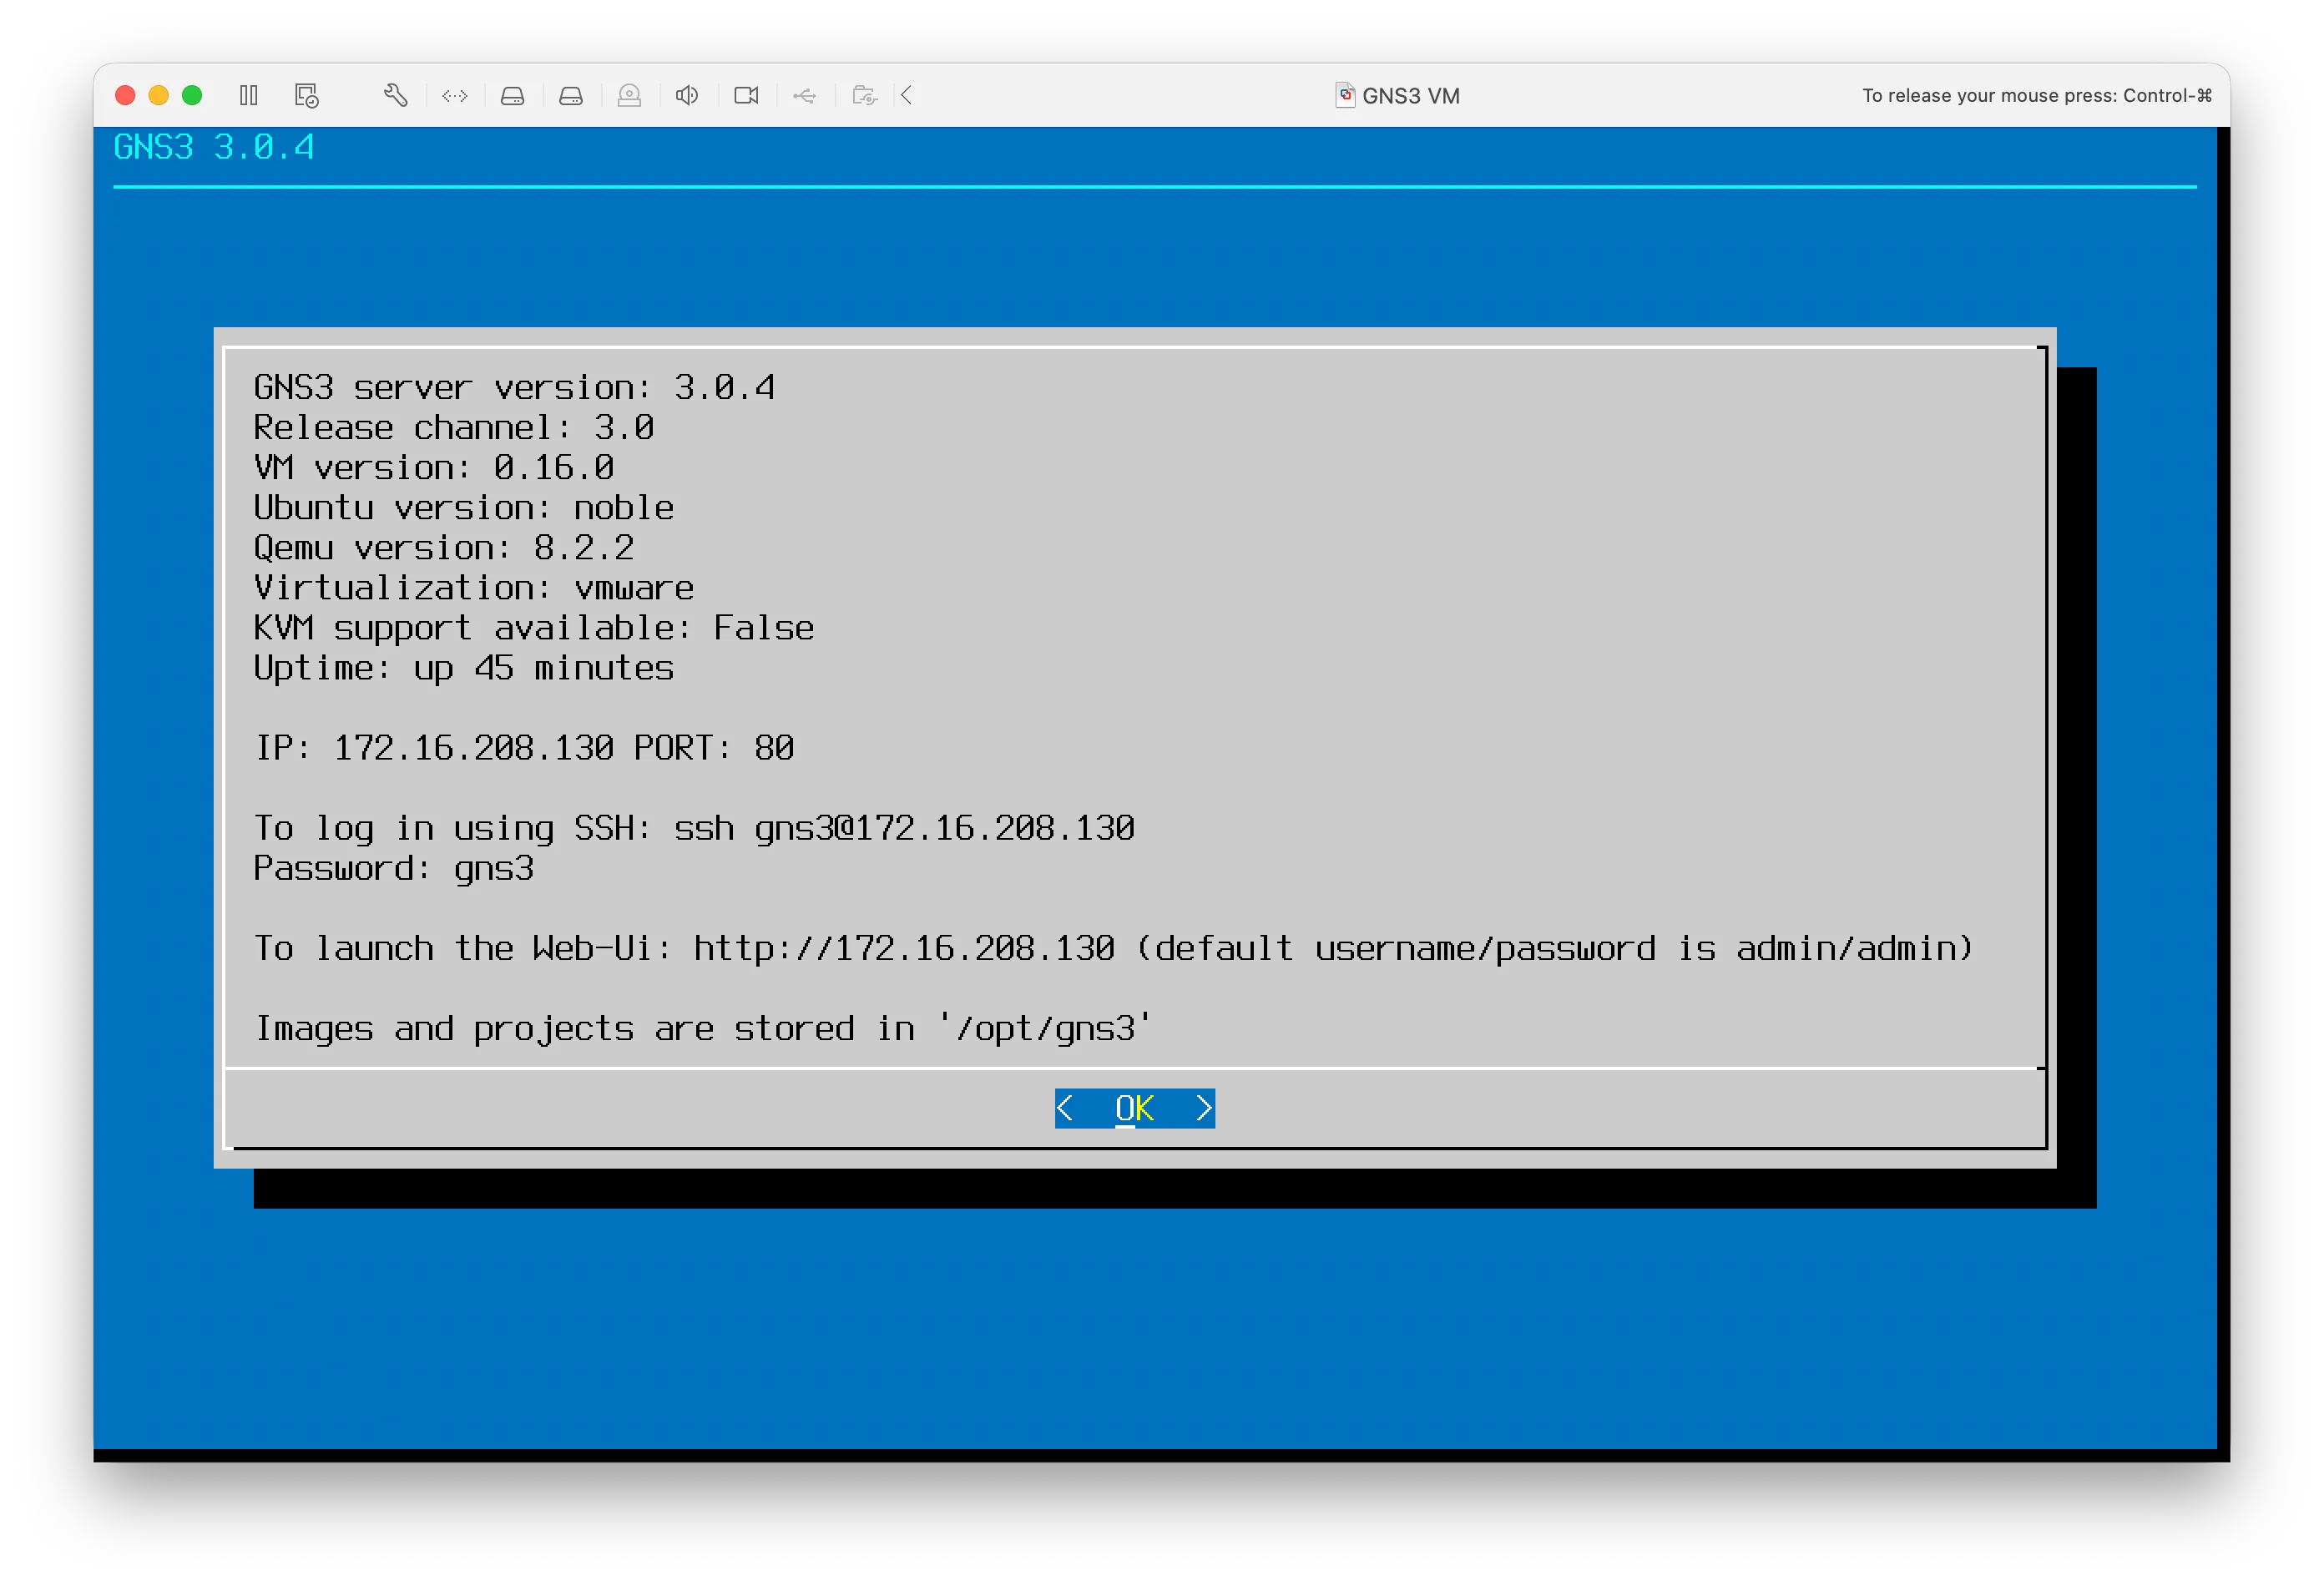
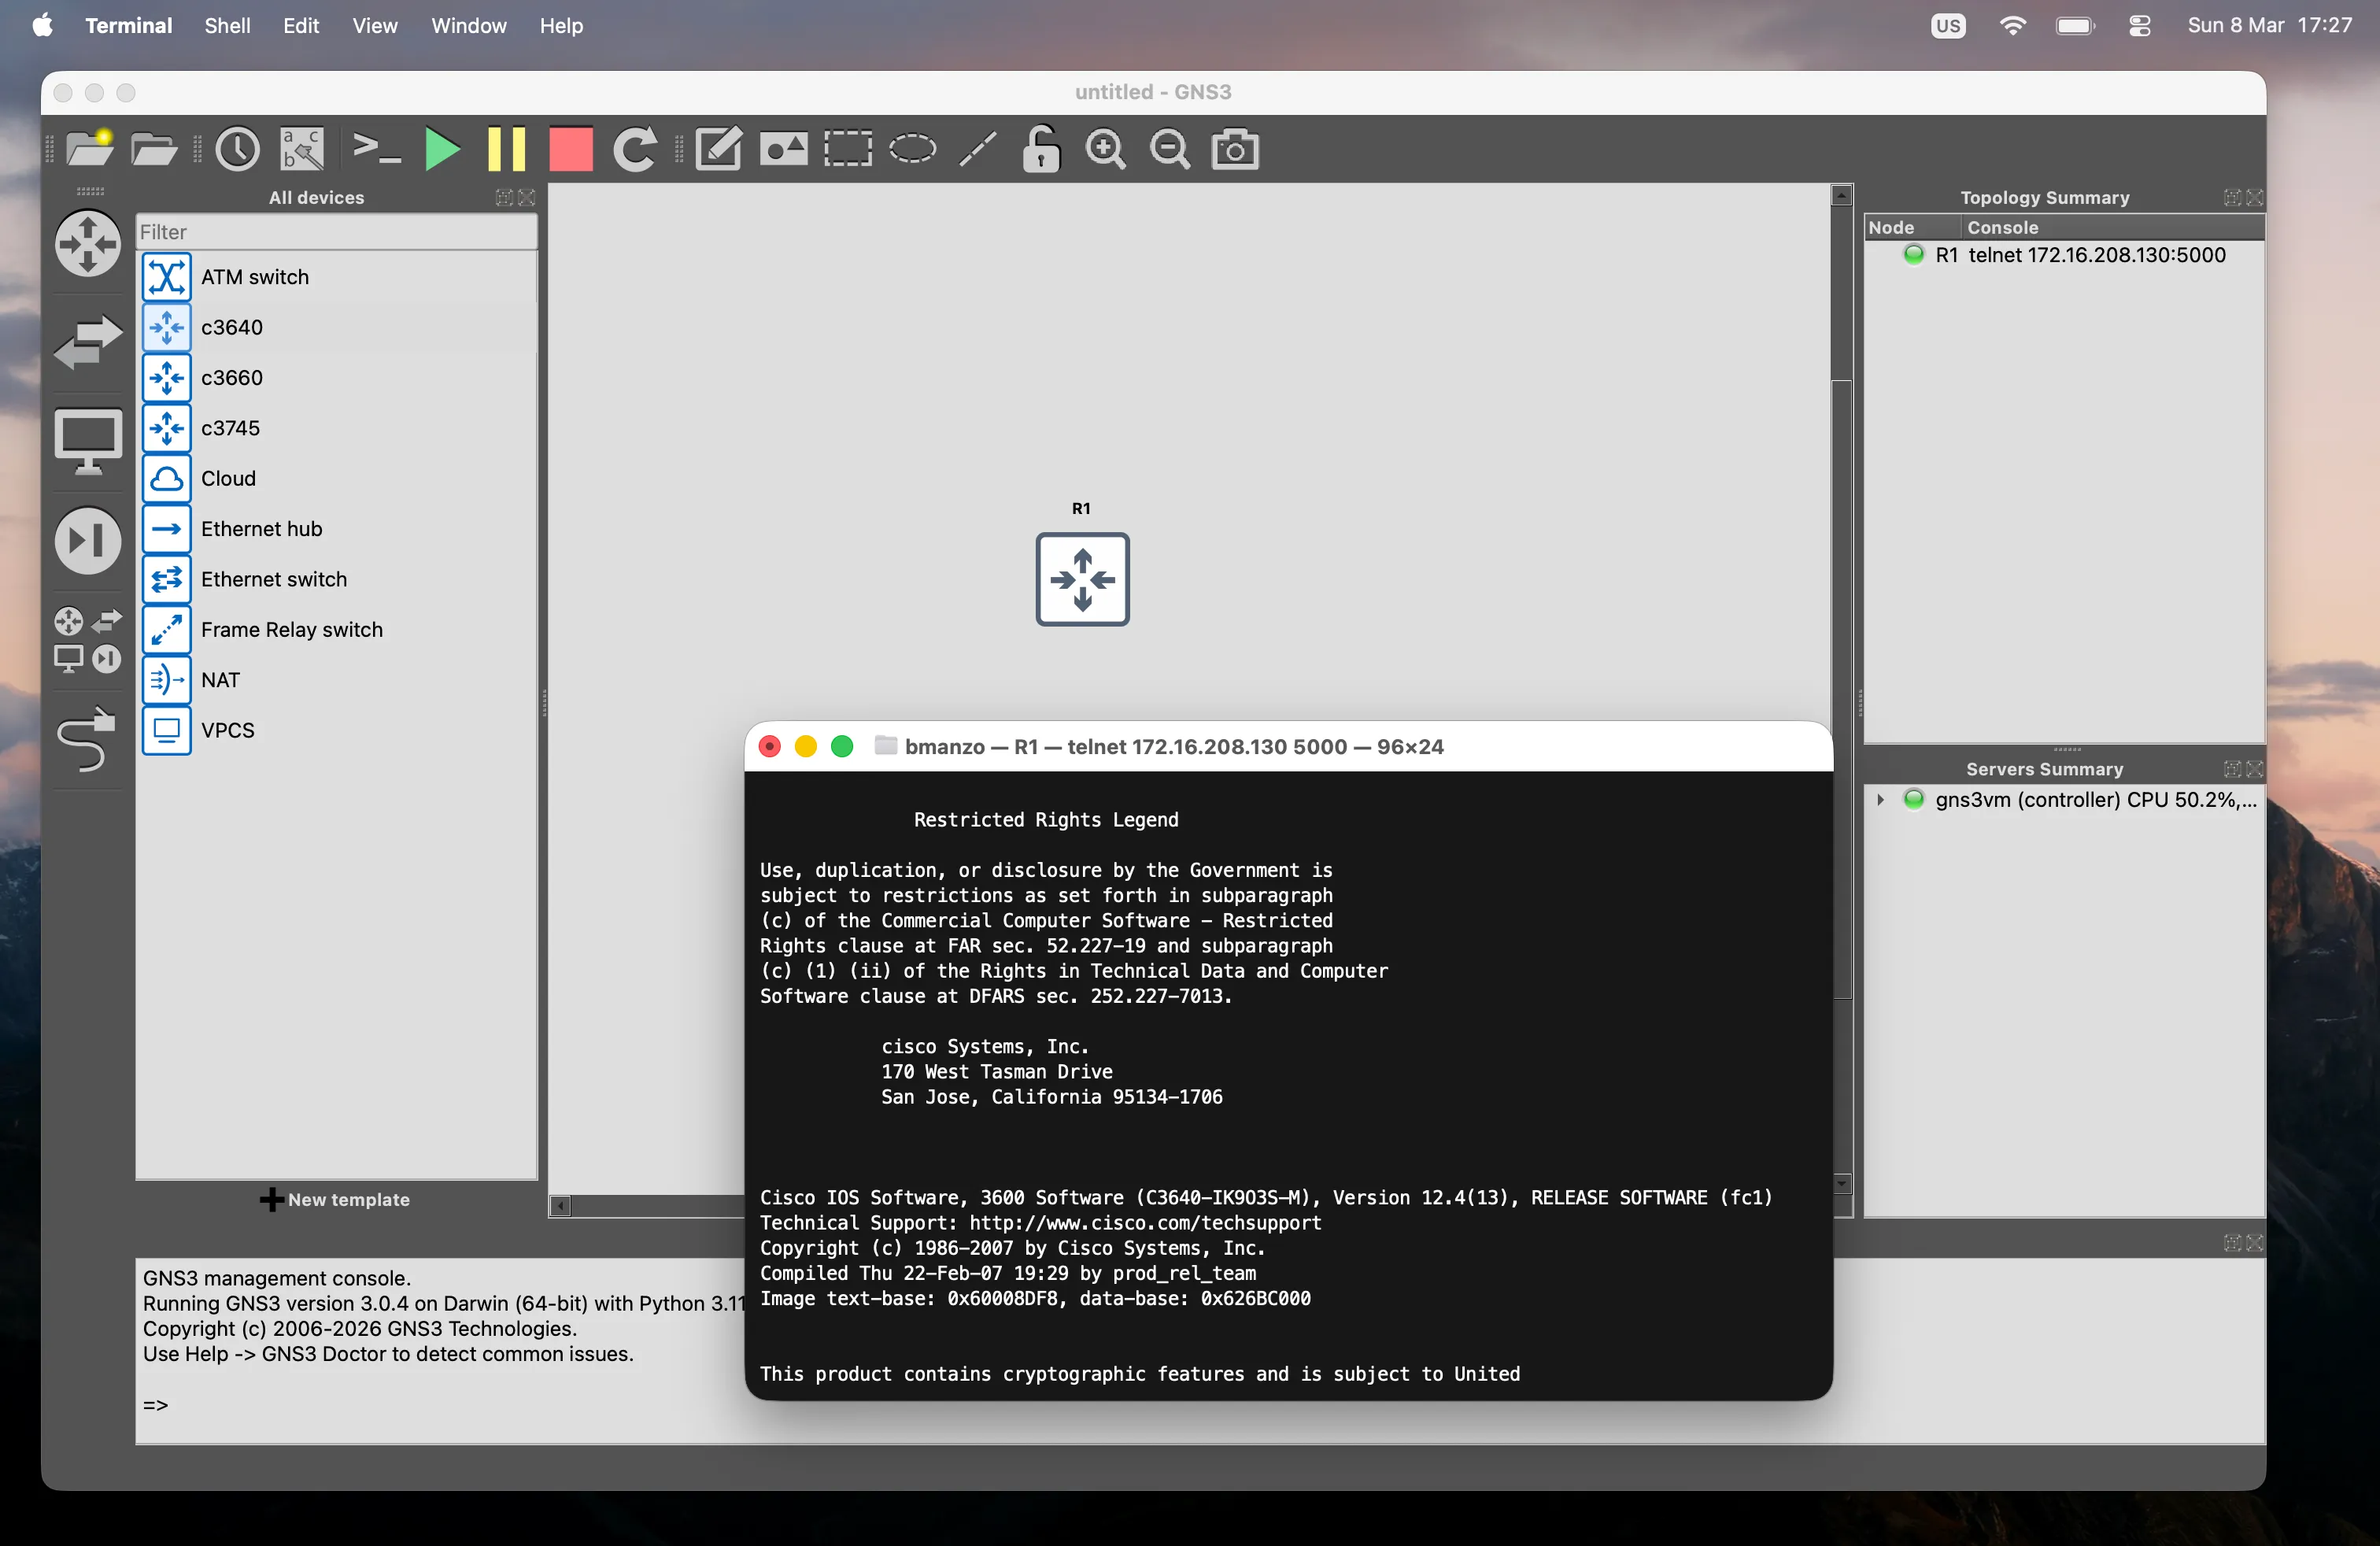
Table of Contents
- Understanding the Problem
- Prerequisites
- Step 1 — Download the Correct Files
- Step 2 — Install VMware Fusion
- Step 3 — Create the GNS3 VM
- Step 4 — Install GNS3
- Step 5 — Connect GNS3 to the VM
- Managing Users and Credentials
- Troubleshooting
- Known Limitations
Understanding the Problem
If you tried running the standard GNS3 VM on your Apple Silicon Mac, you likely saw this error:
“This virtual machine cannot be powered on because it requires the X86 machine architecture, which is incompatible with this Arm machine architecture host.”
This happens because Apple Silicon chips use ARM architecture, while the traditional GNS3 VM is built for x86/Intel. They are fundamentally incompatible at the hardware level.
The solution is to use the official ARM64 version of the GNS3 VM together with VMware Fusion, which supports ARM virtualization on Apple Silicon.
Prerequisites
- Mac with Apple Silicon
- macOS Ventura or later
- At least 5 GB of free disk space
- Internet connection
Step 1 — Download the Correct Files
Go to the official GNS3 repository on GitHub: https://github.com/GNS3/gns3-gui
Then head to the releases page: https://github.com/GNS3/gns3-gui/releases
The version I am currently using and that works reliably is 3.0.4. You can start there or check for a newer stable release.
Download exactly these two files and make sure they are the same version:
| File | Description |
|---|---|
GNS3-3.x.x.dmg | GNS3 desktop application for Mac |
GNS3.VM.ARM64.3.x.x.zip | GNS3 VM for Apple Silicon |
⚠️ Do not download
GNS3.VM.VirtualBox,GNS3.VM.VMware.Workstation, or any.ovafile — those are x86 builds and will produce the same architecture error.
⚠️ The GNS3 client and VM must be the same version. Mismatched versions will cause authentication failures.
Step 2 — Install VMware Fusion
VMware Fusion is free for personal use.
- Download it from: https://www.vmware.com/products/fusion.html
- Install it normally by dragging to Applications
- Register a free account if prompted
Step 3 — Create the GNS3 VM
- Unzip
GNS3.VM.ARM64.3.x.x.zip— you will get two.vmdkdisk files - Open VMware Fusion
- Click + → New
- Select Create a custom virtual machine
- Choose operating system: Linux → ARM Ubuntu 64-bit
- For the virtual disk, select Use an existing virtual disk
- Choose the first
disk1.vmdkfile - Finish the wizard but do not start the VM yet
- Open Settings → Hard Disk → Add Device → Existing Hard Disk
- Add the second
disk2.vmdkfile - Set resources: 2048 MB RAM, 2 vCPUs (adjust based on your Mac’s specs)
Step 4 — Install GNS3
- Open
GNS3-3.x.x.dmg - Drag GNS3 to your Applications folder
⚠️ Make sure you install version 3.x. Version 2.x uses a different authentication system (Basic Auth) and is not compatible with the 3.x VM, which uses JWT tokens. This will cause “Not authenticated” errors even with correct credentials.
Step 5 — Connect GNS3 to the VM
Every time you want to use GNS3, follow this order:
- Open VMware Fusion and start the GNS3 VM
- Wait for the blue screen showing the VM’s IP address
- Open GNS3
To configure the connection:
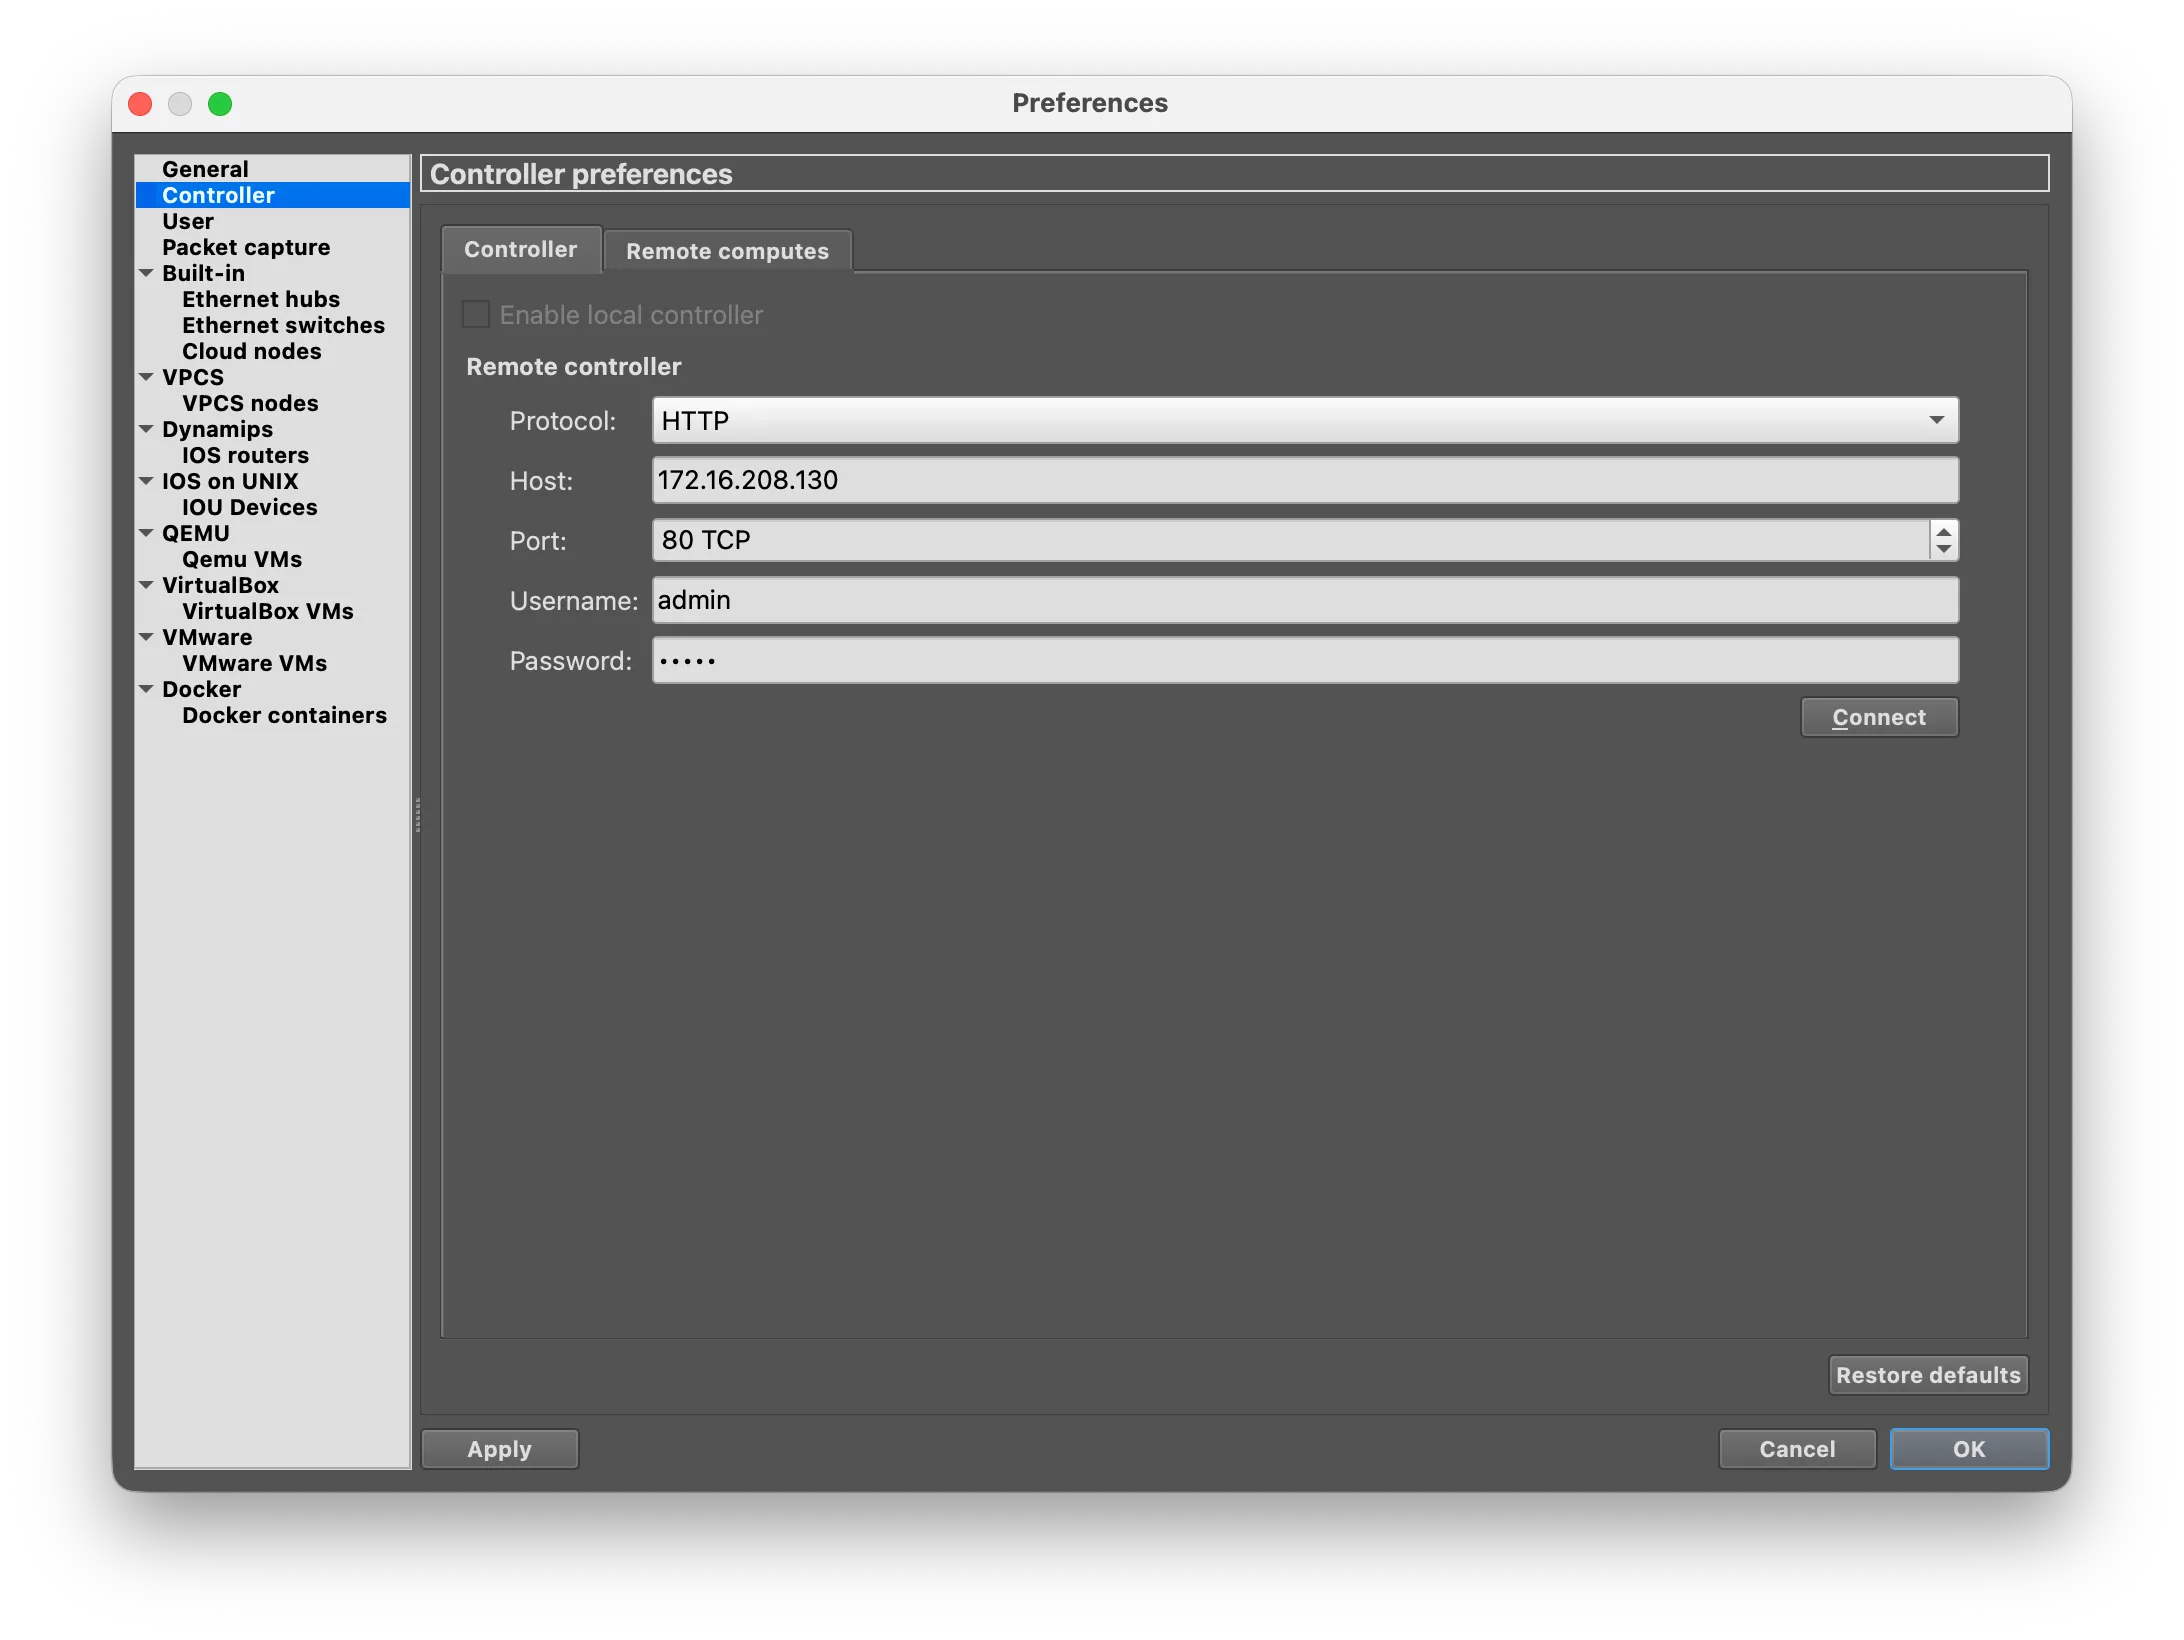
- Open GNS3 → Preferences (
Cmd + ,) - Click GNS3 VM in the left panel
- Enable “Enable the GNS3 VM”
- Set Virtualization engine to VMware Fusion
- Click Refresh — GNS3 should detect the VM automatically
- Click Apply → OK
The GNS3 VM entry in the Servers Summary panel should turn green ✅.
Managing Users and Credentials
GNS3 3.x manages authentication through a web interface. To configure users:
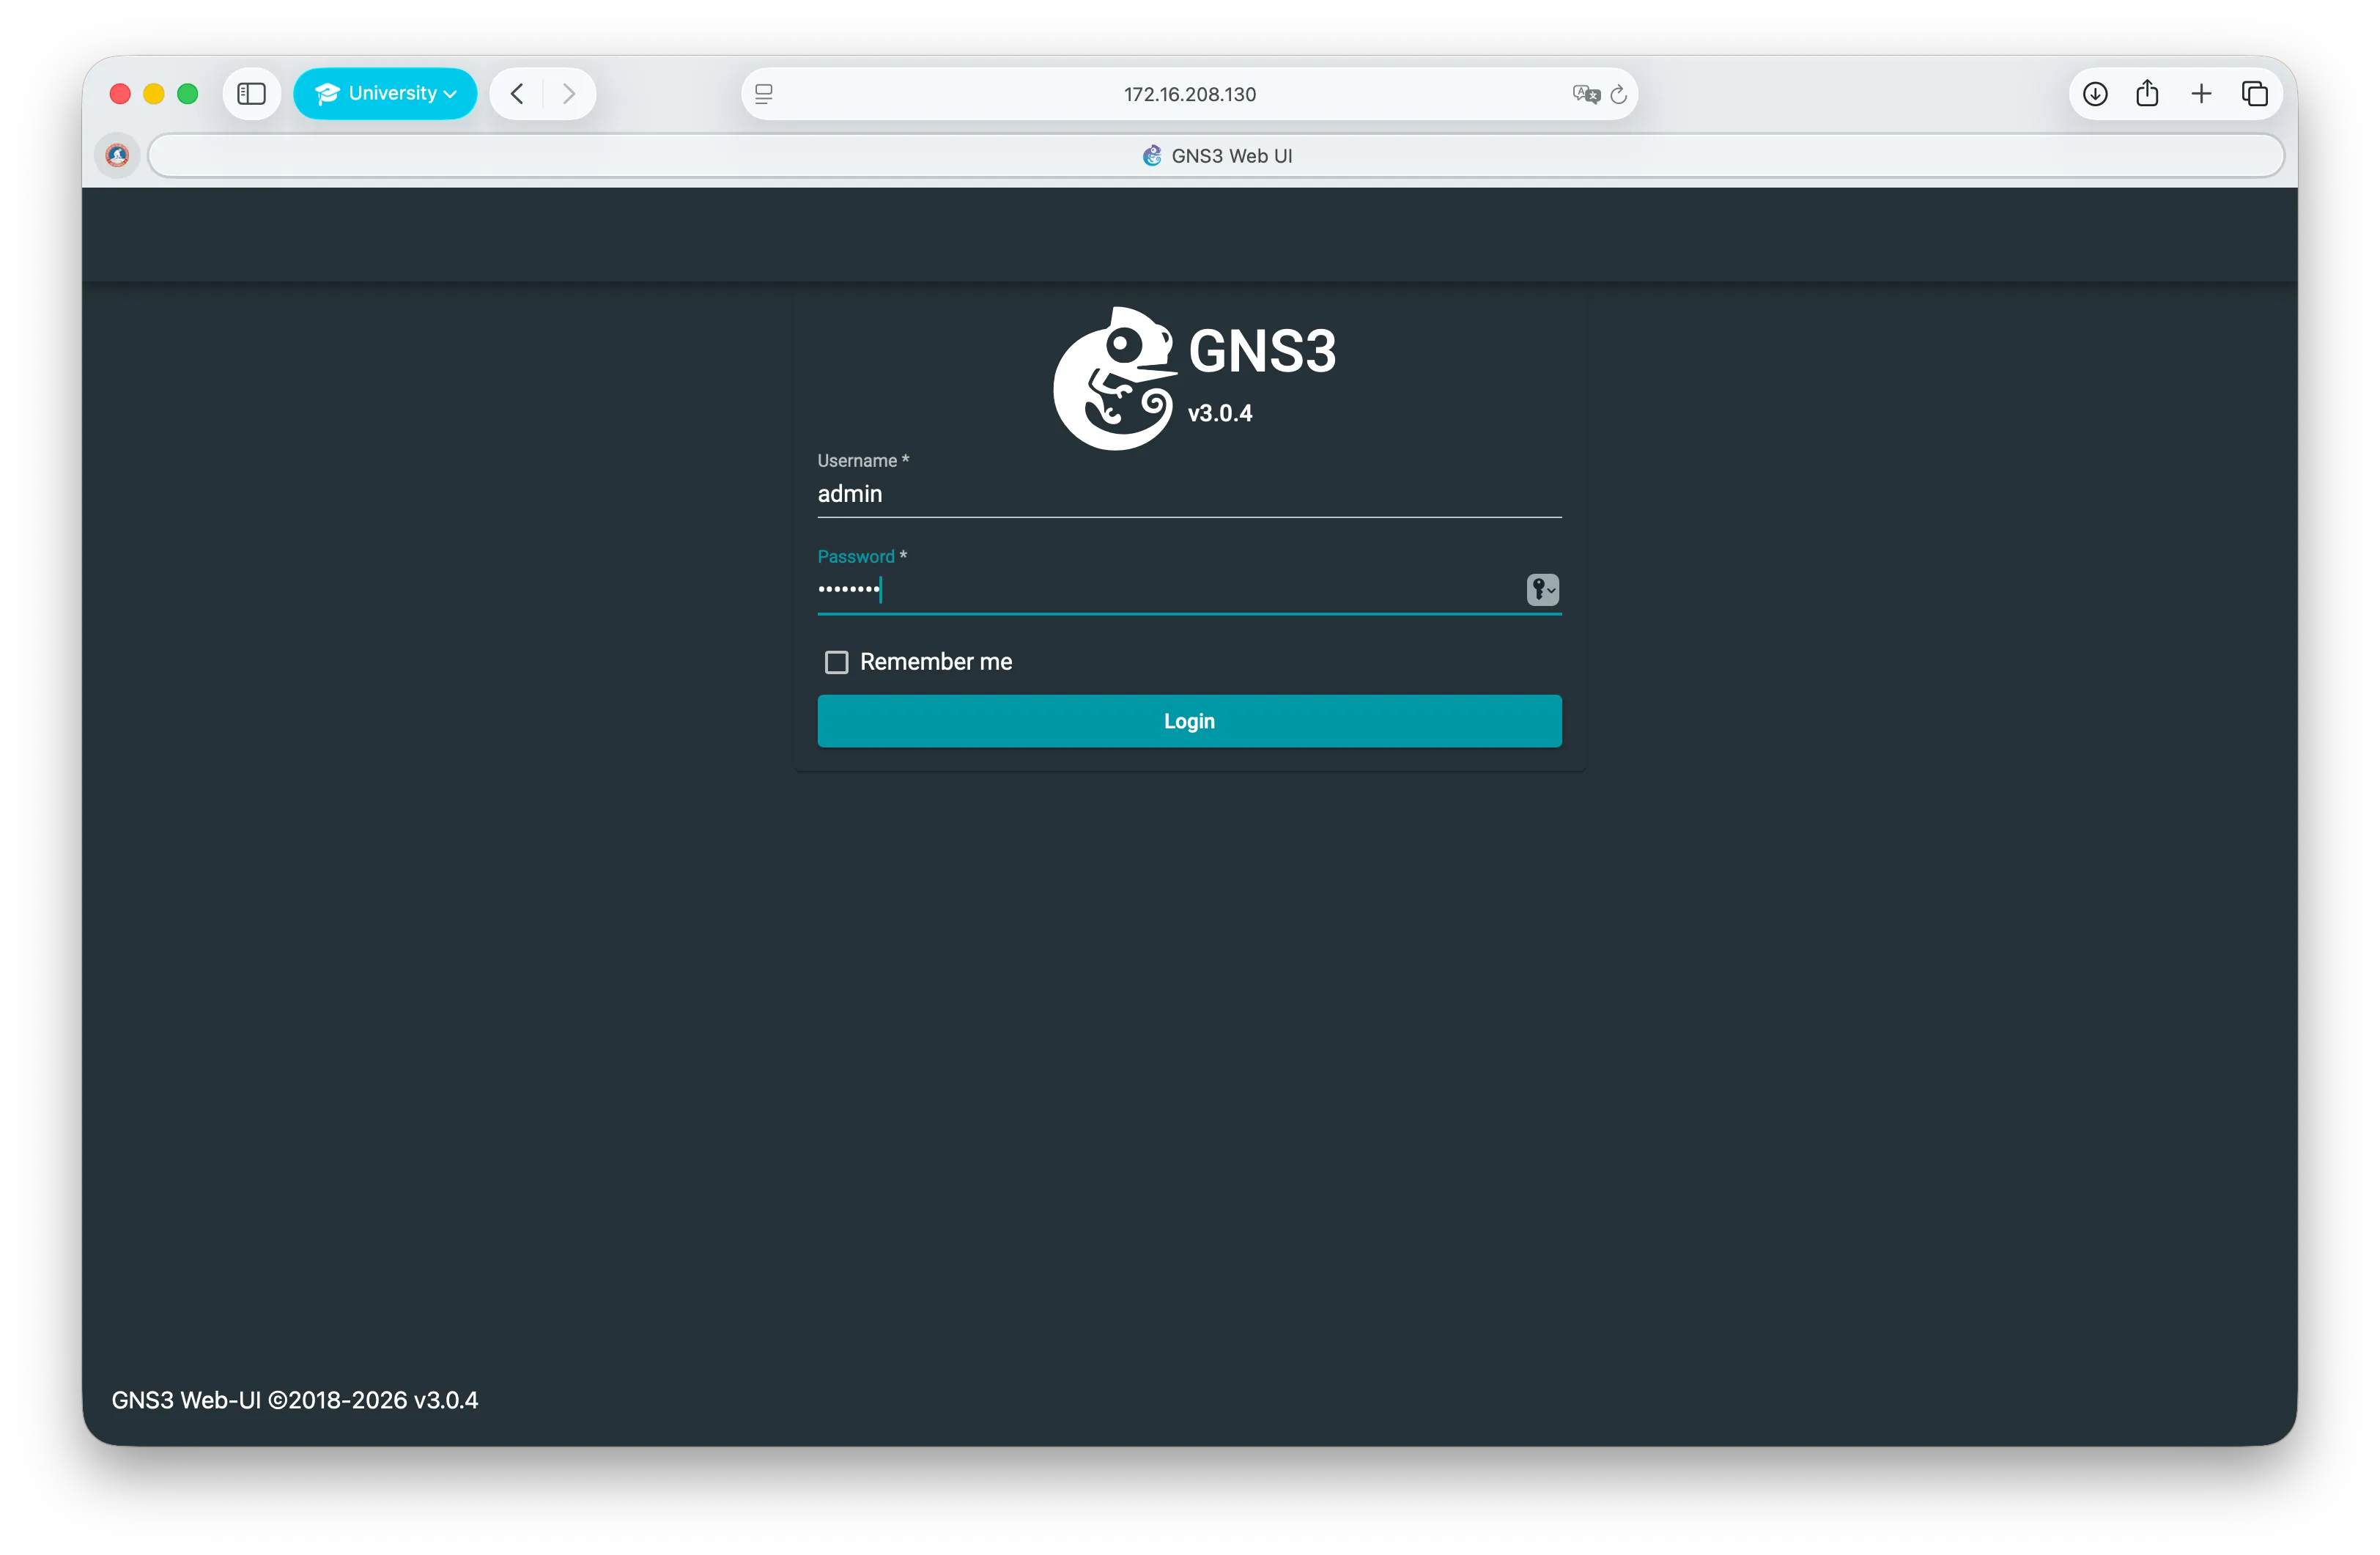
- With the VM running, open your browser and navigate to
http://<VM_IP_ADDRESS>
- Click the ⋮ (three dots) icon in the top right corner
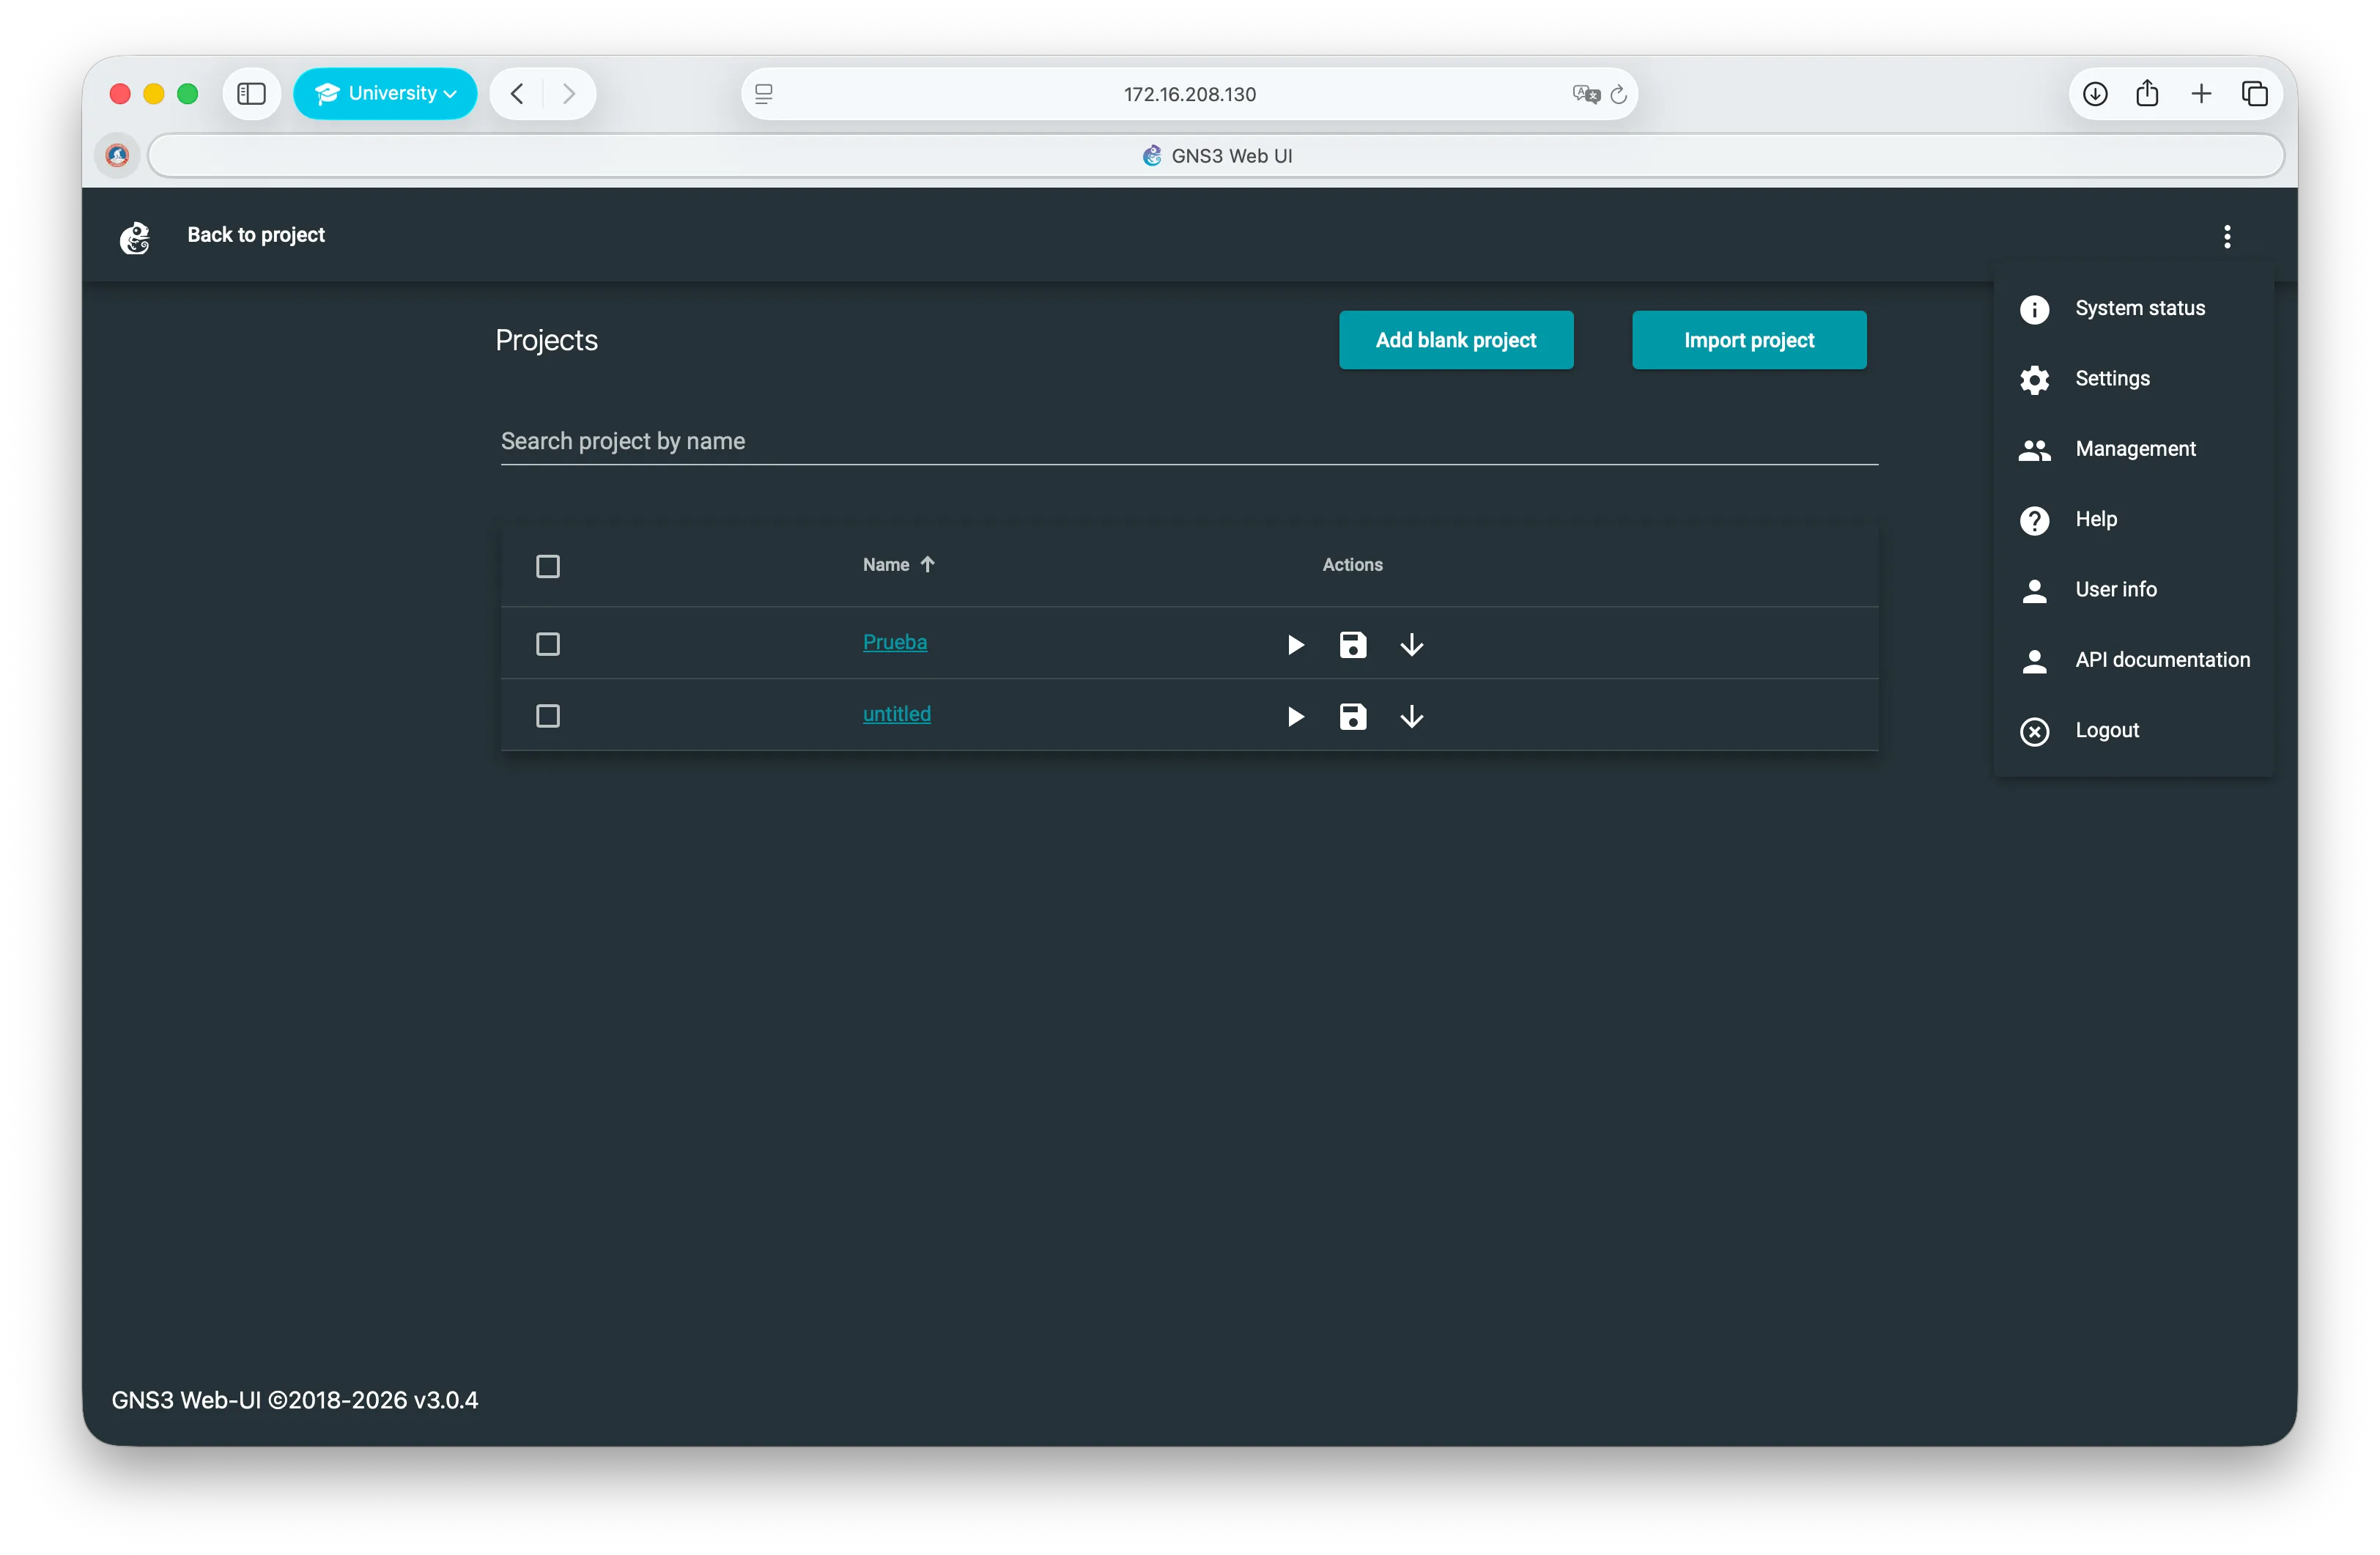
- Go to Users — you will see the list of configured accounts
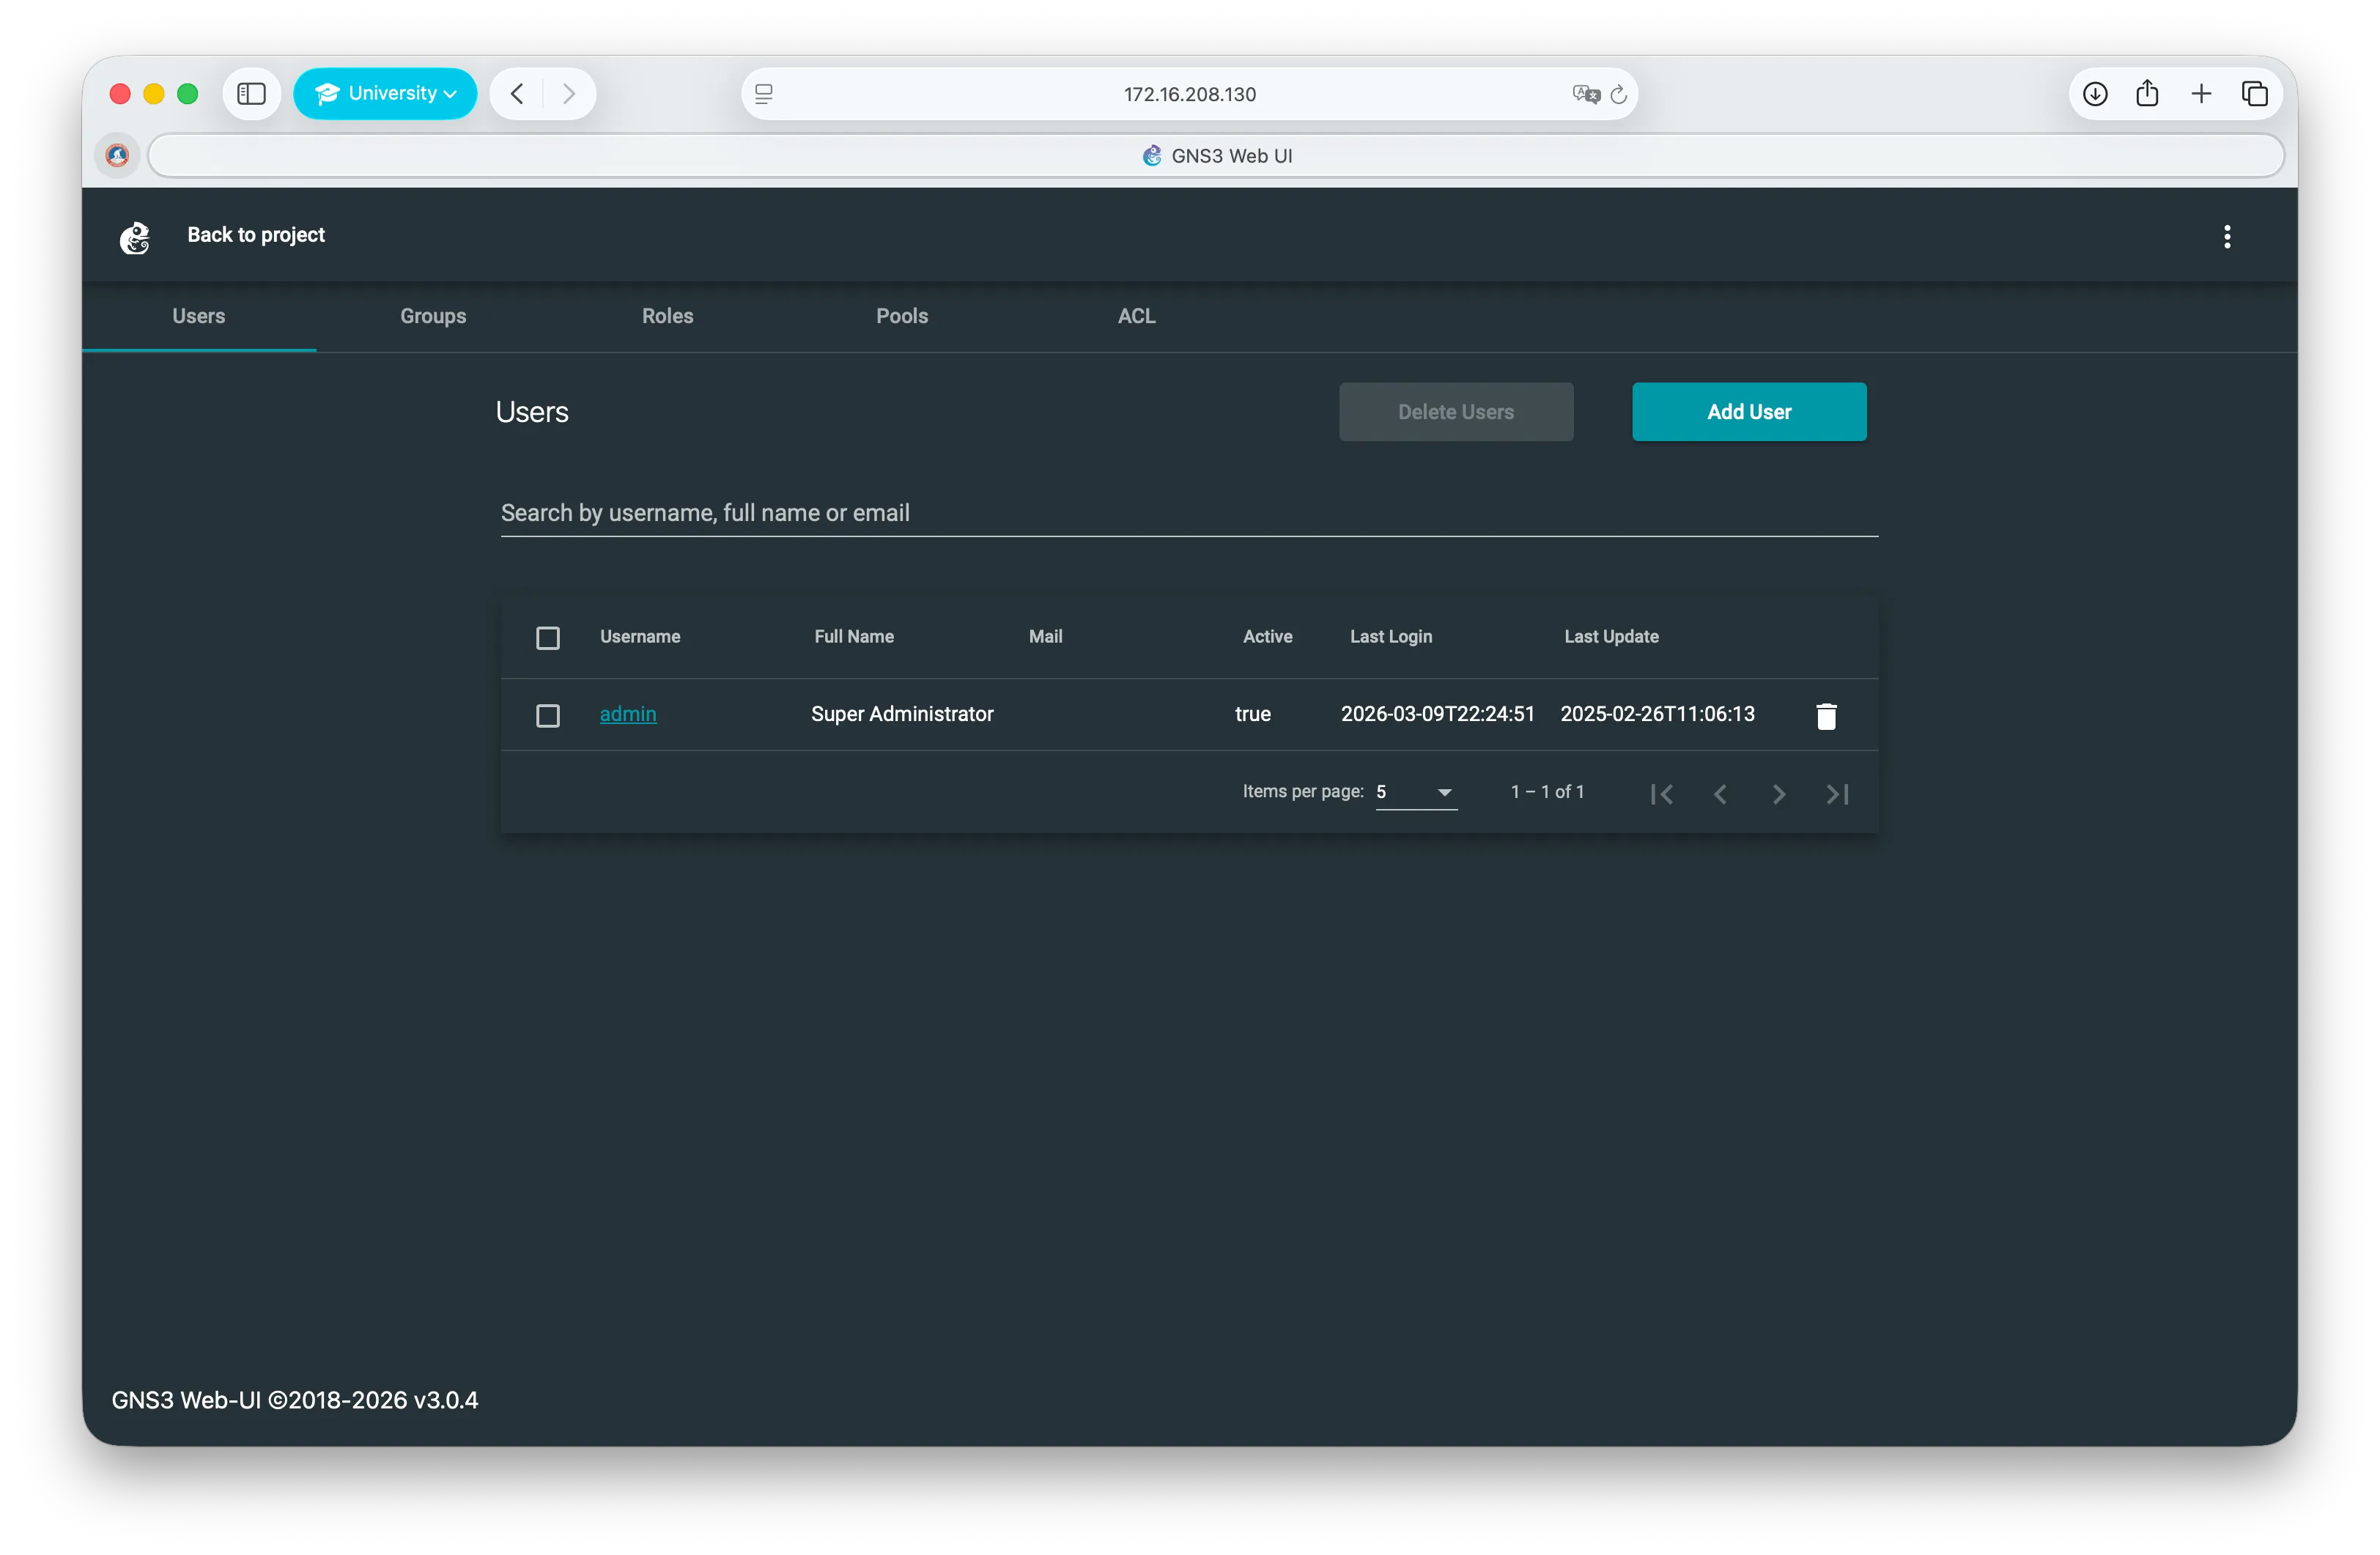
- Select the admin user and set or update the password as needed
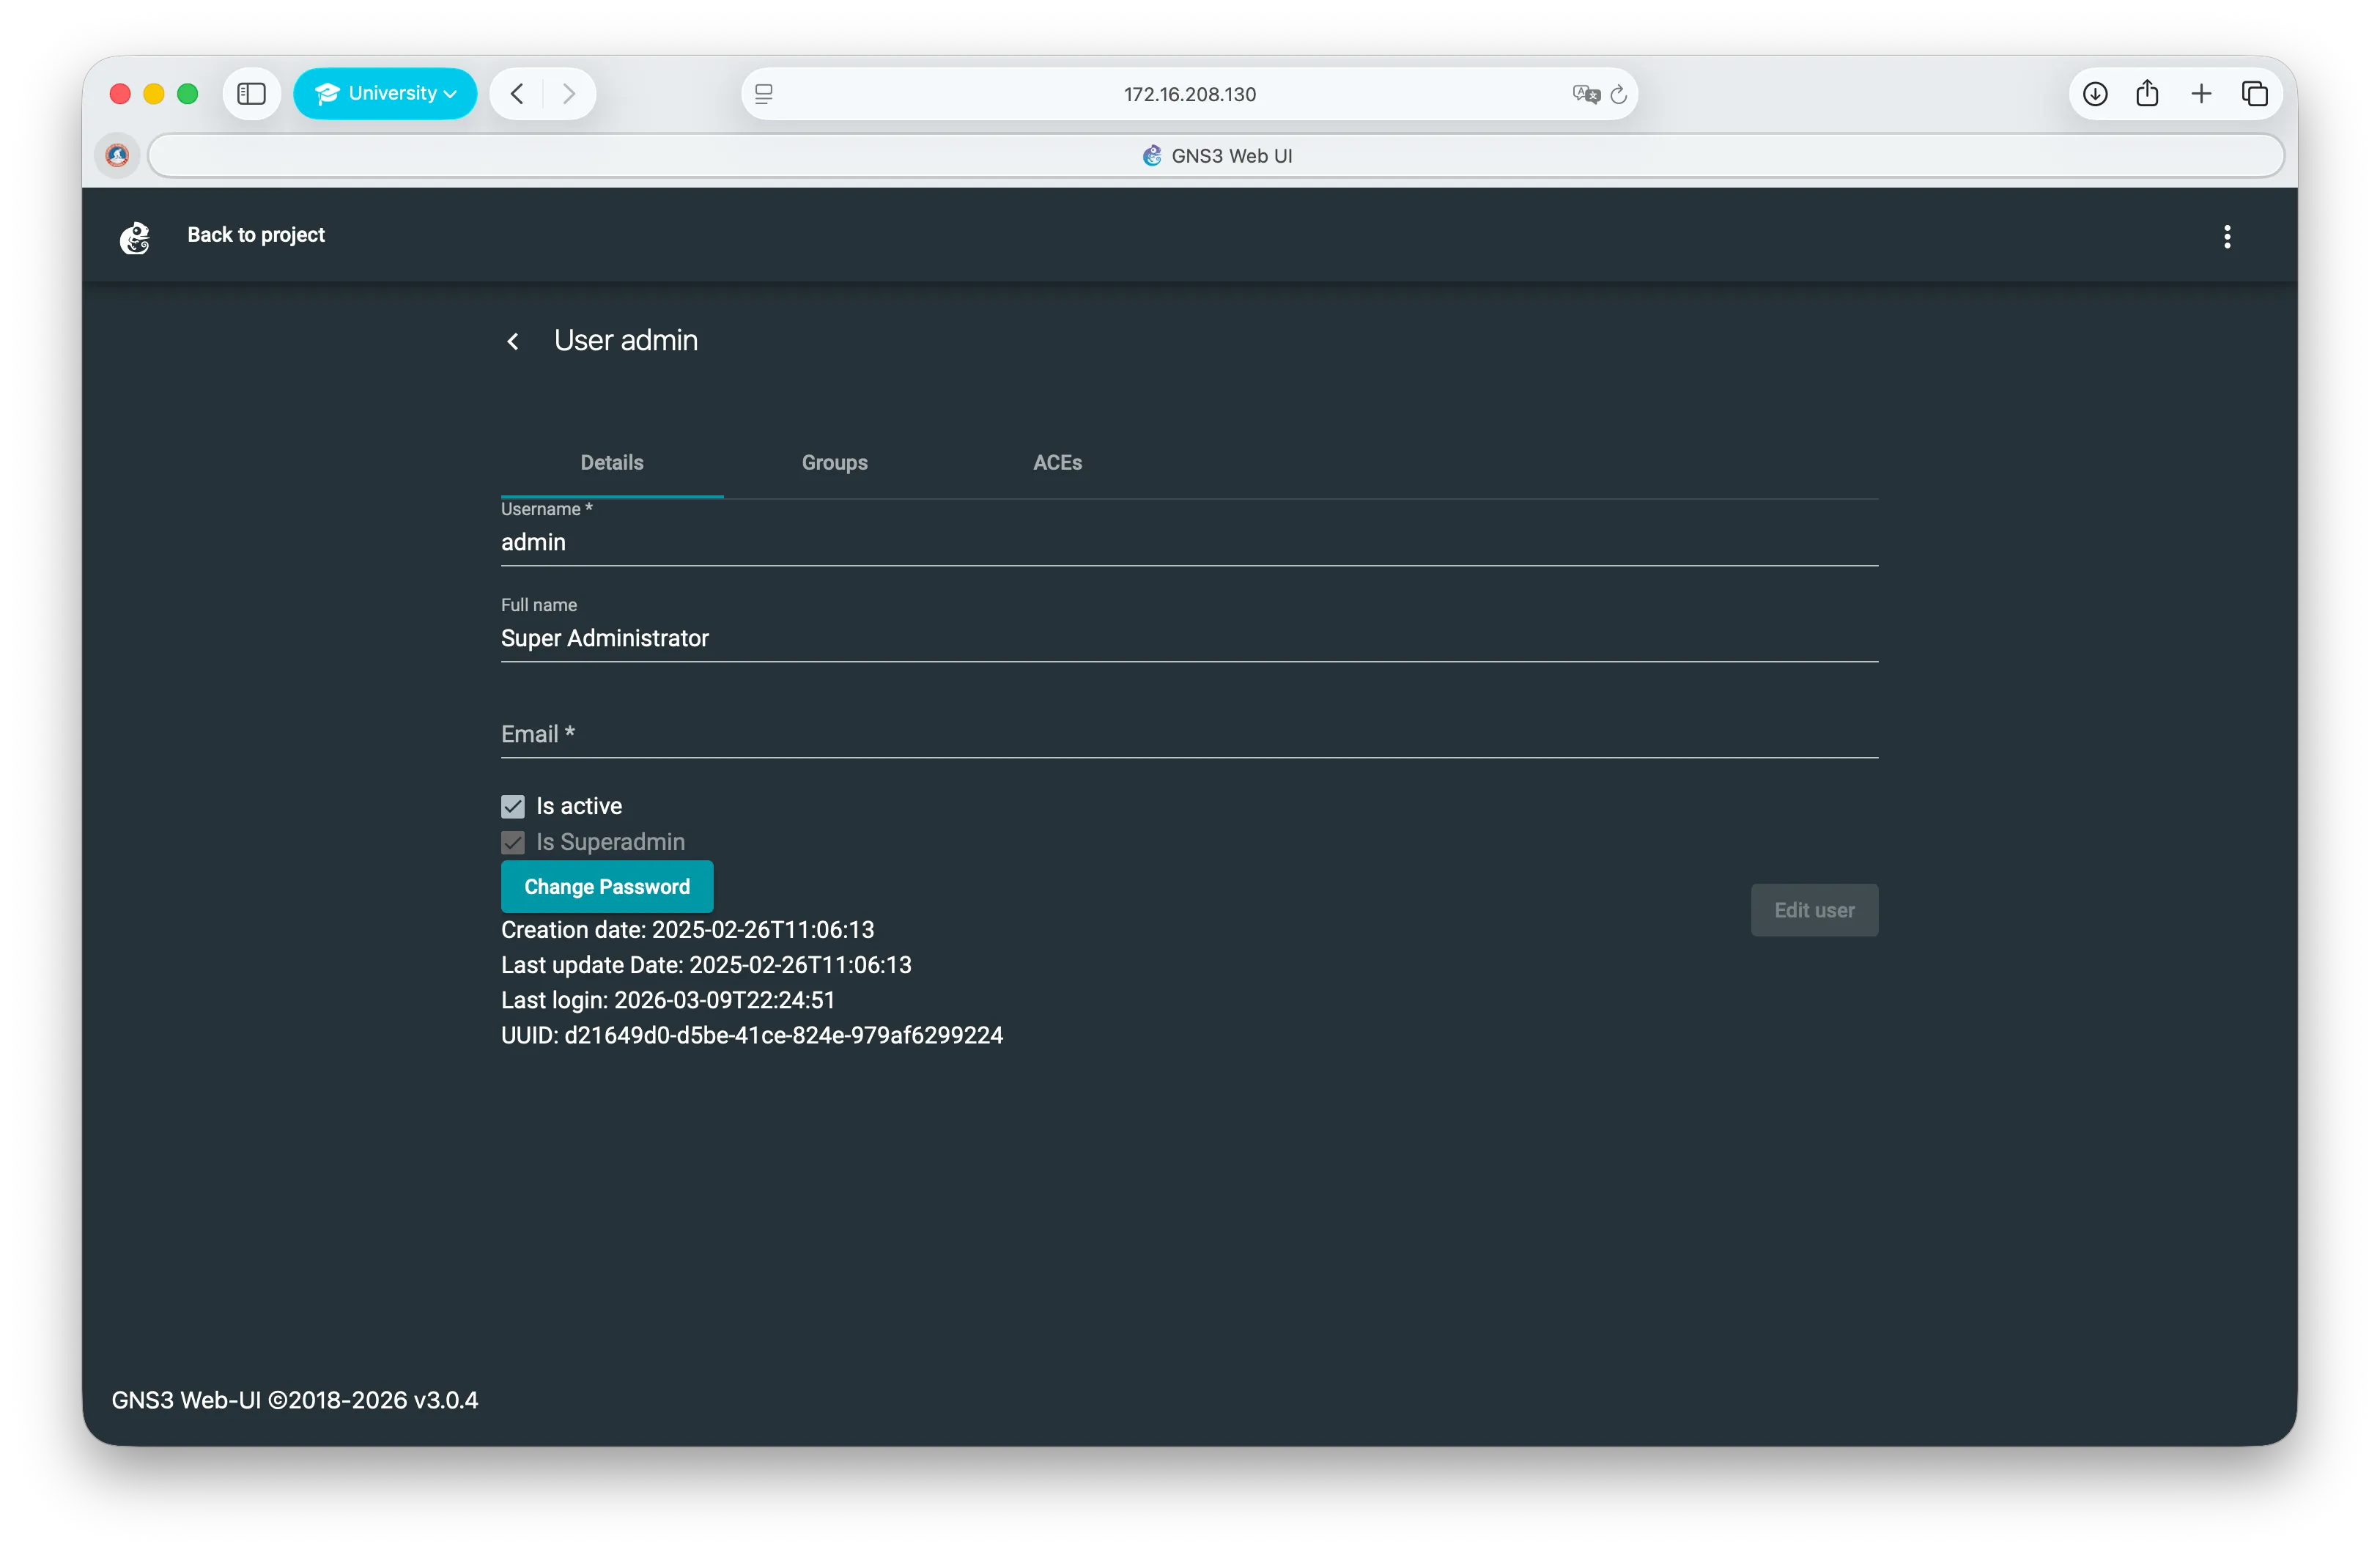
The default credentials after a fresh install are admin / admin, but it is recommended to change them.
Troubleshooting
The server appears gray in GNS3
If the GNS3 VM entry appears in the Servers Summary panel but is gray, GNS3 has detected the VM but could not authenticate. The VM is reachable — the issue is credentials.
- Open your browser and go to
http://<VM_IP>to access the web interface - Log in and verify the admin password is correctly set (default is
admin / admin) - In GNS3, go to Preferences → GNS3 VM and click Refresh
If the VM is not appearing at all:
- Make sure the VM is running in VMware Fusion before opening GNS3
- Verify the IP shown matches the one on the VM’s blue screen
The VM’s IP address changes on every restart
The VM uses DHCP by default, so the IP may change between sessions. You can set a static IP by editing /etc/netplan/90_gns3vm_static_netcfg.yaml inside the VM, or simply click Refresh in GNS3 preferences each time.
”Not authenticated” error
This can have two causes:
- Version mismatch — Verify both the GNS3 client and VM are running version 3.x. Version 2.x uses Basic Auth while 3.x uses JWT tokens, making them incompatible even with correct credentials.
- Wrong credentials — Reset the admin password through the Web UI at
http://<VM_IP>. The default isadmin / admin.
KVM support available: False
This is expected on Apple Silicon with VMware Fusion. KVM is a Linux virtualization feature not available in this setup. It does not affect basic GNS3 functionality.
Known Limitations
- KVM is not available, which limits nested virtualization
- Dynamips-based devices (older Cisco IOS) may have reduced performance
- Docker containers inside GNS3 require ARM64-compatible images